Connect MCP
Connect Falconer MCP to your AI client so it can search, read, create, and update Falconer documents.
Falconer’s MCP endpoint is:
https://falconer.com/api/mcpWhen your client connects, it opens Falconer OAuth in your browser. Sign in with your Falconer account and approve the connection.
Claude
Section titled “Claude”Falconer supports both Claude.ai and Claude Code: add Falconer to Claude.ai as a custom connector, or configure Falconer in Claude Code from the command line.
Claude.ai
Add to Claude.ai
This opens Claude with the Falconer connector name and MCP URL prefilled. Connect the connector, then sign in to Falconer when Claude asks for authorization.
Manual setup:
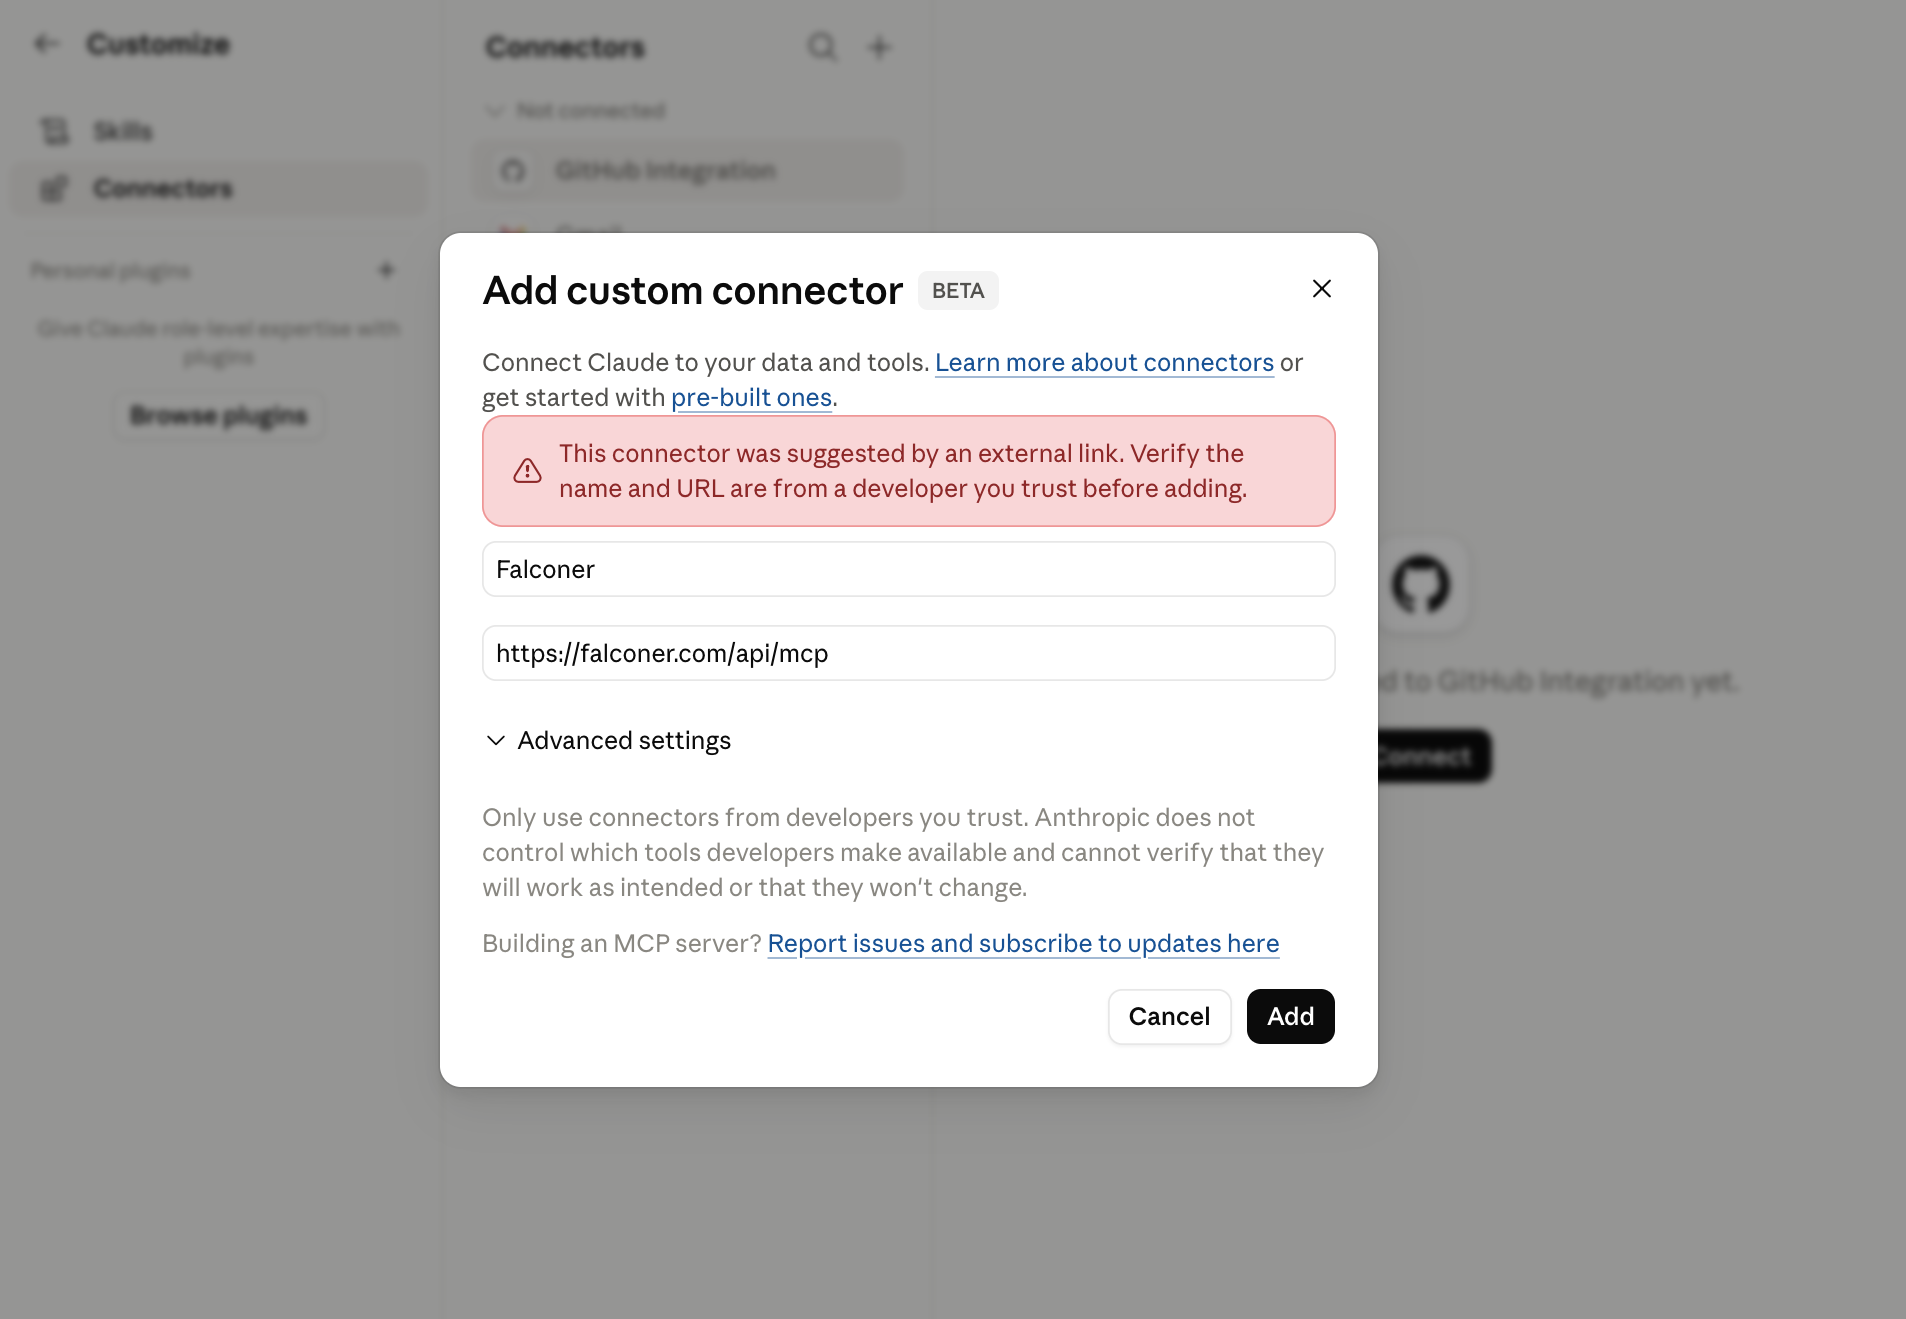
- Open Claude connectors.
- Click Add custom connector.
- Set Name to
Falconer. - Set the MCP server URL to
https://falconer.com/api/mcp. - Leave OAuth Client ID and OAuth Client Secret empty.
- Click Add, connect the Falconer connector, and sign in to Falconer when Claude asks for authorization.
Claude Code
Run this command in a terminal:
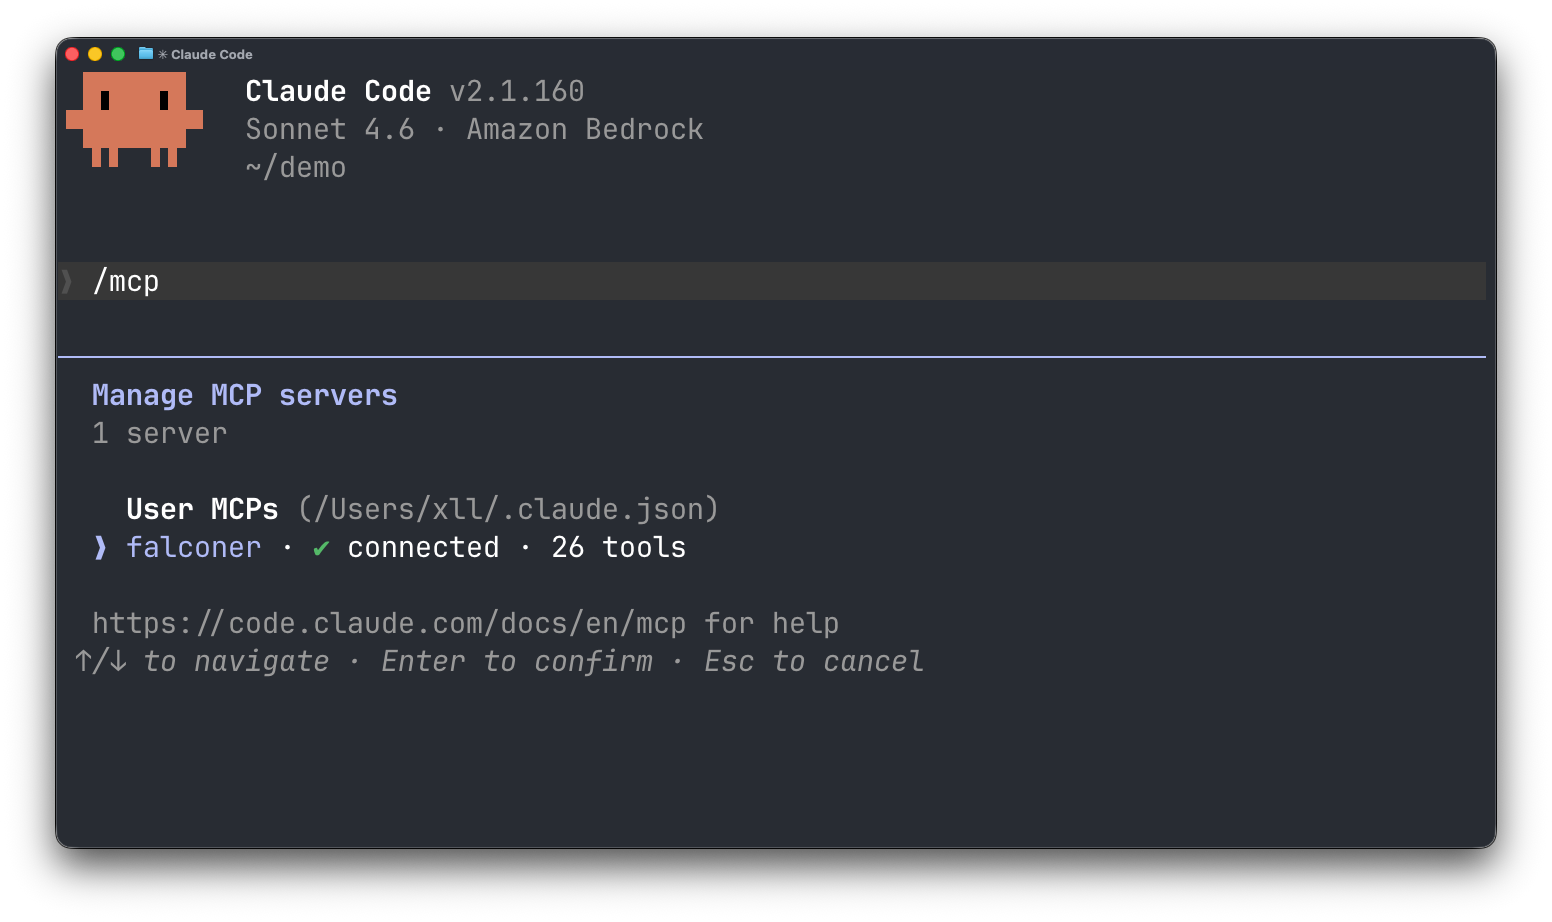
claude mcp add --transport http --scope user --client-id falconer-claude-code --callback-port 49152 "falconer" "https://falconer.com/api/mcp"Then open Claude Code and run:
/mcpFollow the browser sign-in flow. If port 49152 is unavailable, change it to another local callback port and rerun the command.
Cursor
Section titled “Cursor”Falconer supports both Cursor surfaces: add Falconer to the Cursor app for editor workflows, or configure Cursor Agent for agent sessions.
Cursor app
Add to Cursor app
This opens Cursor with Falconer’s MCP configuration. Connect the Falconer server, then sign in to Falconer when Cursor asks for authorization.
For manual setup, create or update .cursor/mcp.json in your project:
{ "mcpServers": { "Falconer": { "type": "http", "url": "https://falconer.com/api/mcp" } }}Open Cursor MCP settings and complete the Falconer OAuth flow if prompted.
Cursor Agent
Open Cursor Agent
- Add a new MCP server named
Falconer. - Use
https://falconer.com/api/mcpas the MCP server URL. - Click Login to start the OAuth flow for Falconer.
Codex CLI
Section titled “Codex CLI”Falconer supports Codex CLI through an OAuth-backed MCP connection configured from the terminal.
Run this command in a terminal:
codex mcp add falconer --url "https://falconer.com/api/mcp" --oauth-client-id falconer-codex-cli --oauth-resource "https://falconer.com/api/mcp"Verify the server is listed:
codex mcp list
Disconnect MCP
Section titled “Disconnect MCP”Disconnect Falconer in two places if you want to fully remove access.
First, revoke Falconer-side authorization. Open Personal settings > Connected accounts, then disconnect the relevant MCP client. This revokes that client’s Falconer OAuth tokens, so it can no longer access Falconer using your account.
Then remove Falconer from your MCP client.
For Claude Code:
claude mcp remove falconerFor Codex CLI:
codex mcp remove falconerFor Cursor app, remove the Falconer entry from your Cursor MCP config or remove Falconer from Cursor MCP settings.
For Cursor Agent, remove Falconer from Cursor Agent MCP settings.
For Claude.ai, remove or disconnect the Falconer custom connector from Claude.ai connector settings.
For other clients, remove Falconer using that client’s MCP documentation.
Troubleshooting
Section titled “Troubleshooting”| Issue | What to do |
|---|---|
| The client says authentication is required | Reconnect Falconer and complete the browser OAuth flow. |
| The client cannot choose an organization | Ask it to call list_organizations, then use the returned organizationId. |
| The token expired or was revoked | Reconnect Falconer from your MCP client. |
| Your client does not support Falconer MCP | Use Claude.ai, Claude Code, Codex CLI, Cursor, or another client that supports HTTP MCP. You can also use the Falconer CLI for direct command-line access. |